Users
Users are extremely important for any event. Without users, an event would have no purpose or value. Eventify is designed to facilitate easy management of users of all groups for an event.
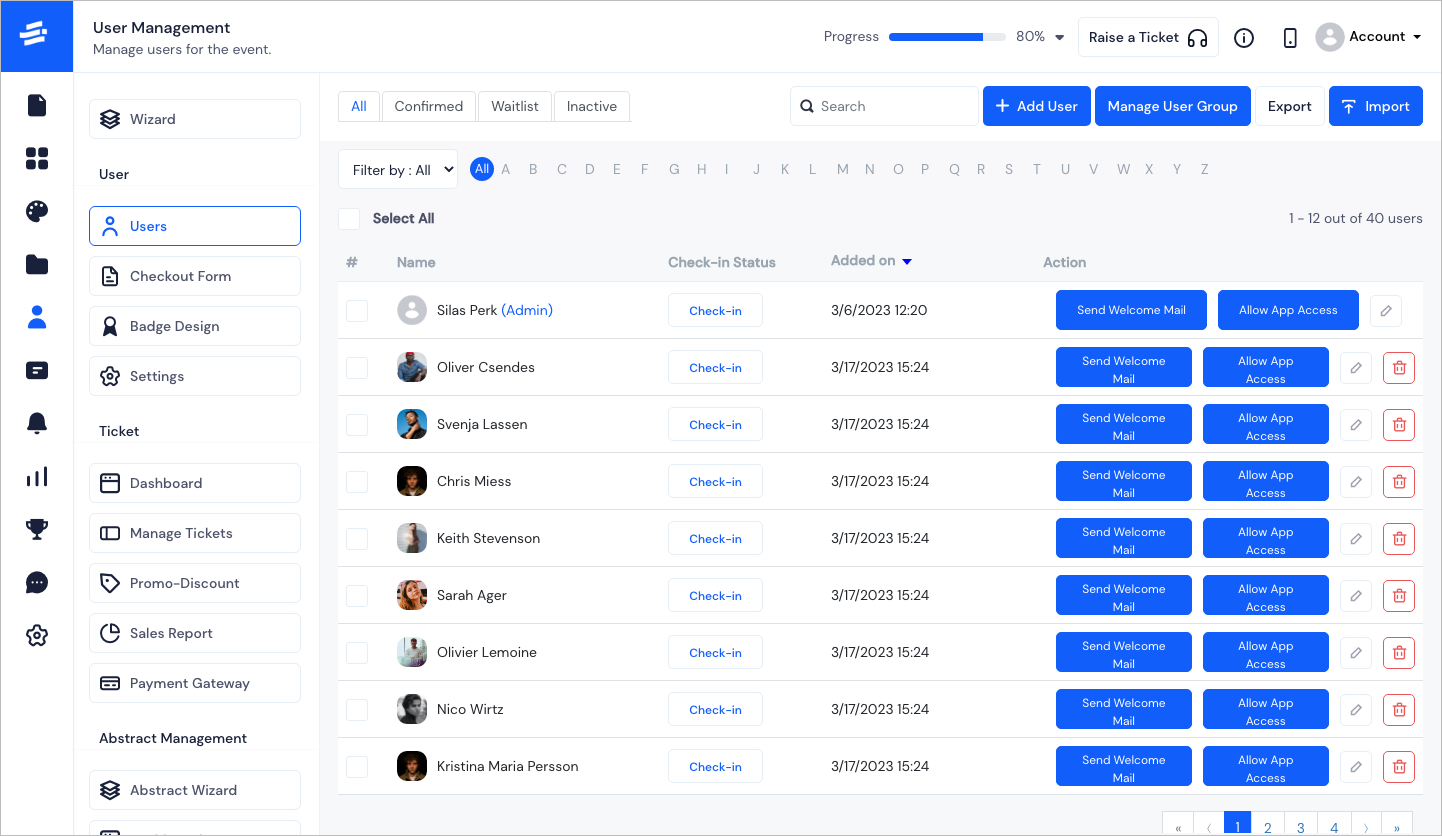
To Add a new User, click on the Add User button. The Add User pop-up window will appear.
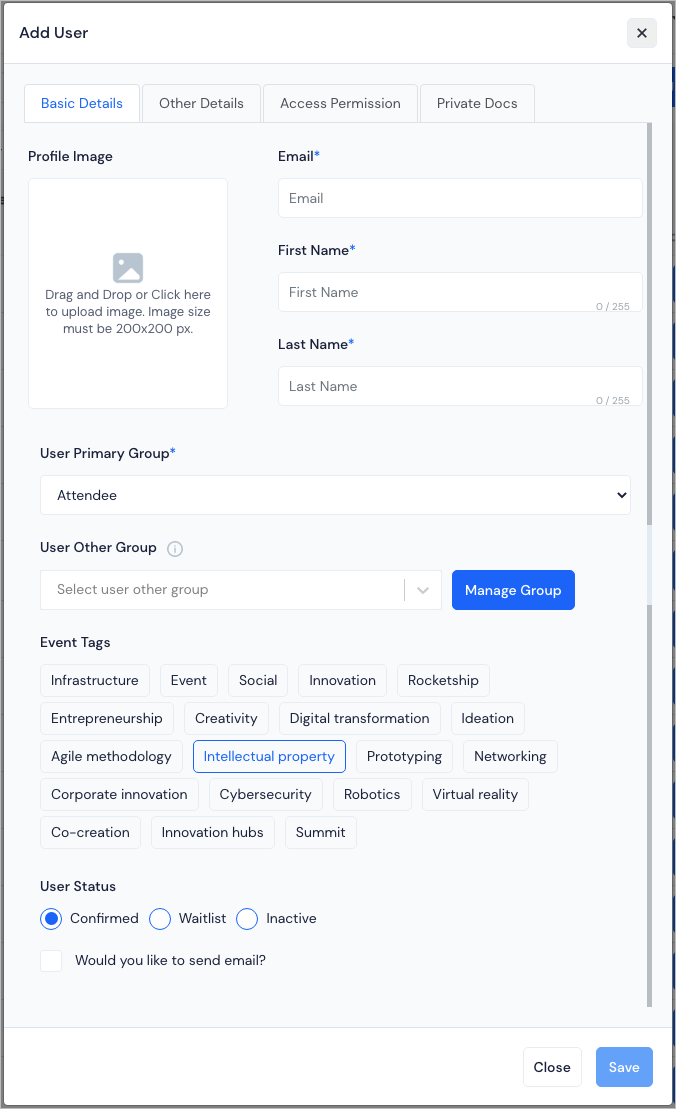
In the first tab, Basic Details, enter the following
The First Name
The Last Name
The Profile Image of the User. The minimum recommended image size is 200 wide x 200 tall.
The Email
The User Primary Group for the user.
Note: You can add multiple groups, as well as custom groups for a user.
Select the tags that matches with the user from the list of Event Tags
Set the status of the user - Confirmed, Waitlist or Inactive
Check 'Would you like to send email?', if you want to send the welcome email
At this point you can click on Save Changes. The Basic Details of the user will be displayed. Proceed similarly to add more users.
- There is an option to add more details about the user from the second tab - Other Details
Here you can fill out the informations as set from the checkout form. Some valuable information to collect are:
Bio where you can enter the description of the user.
Company where you can enter the company of the user.
Designation where you can enter the designation of the user.
Select the Networking/GDPR Consent - If cheked, this enables the user to share their profile and connect with other users.
For contact, you can include details like Phone No., Facebook, Twitter, LinkedIn etc.
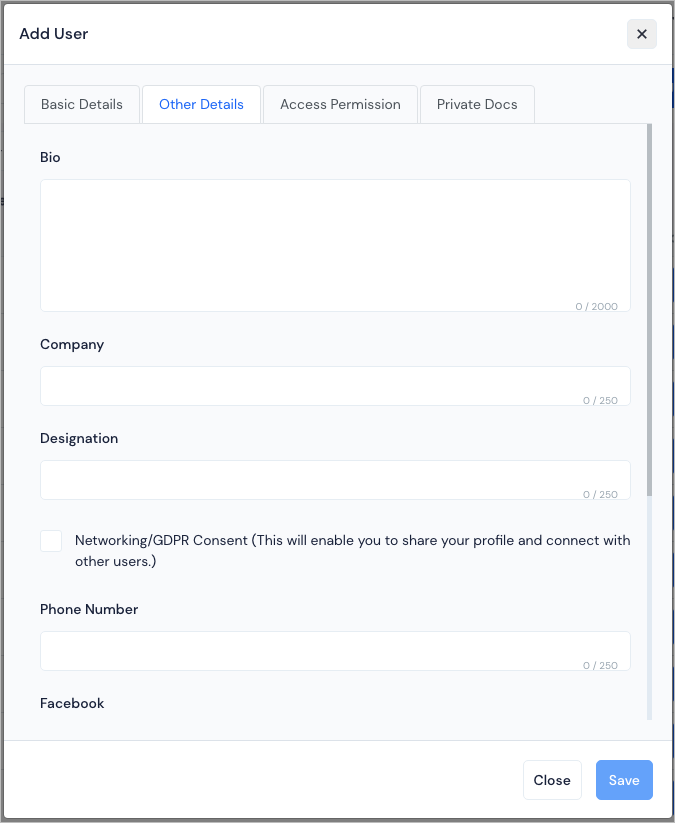
Once you have added all necessary details, click on Save to save the information.
tip
Other Details is fully customisable from the available form under the User Registration>User>Checkout Form.
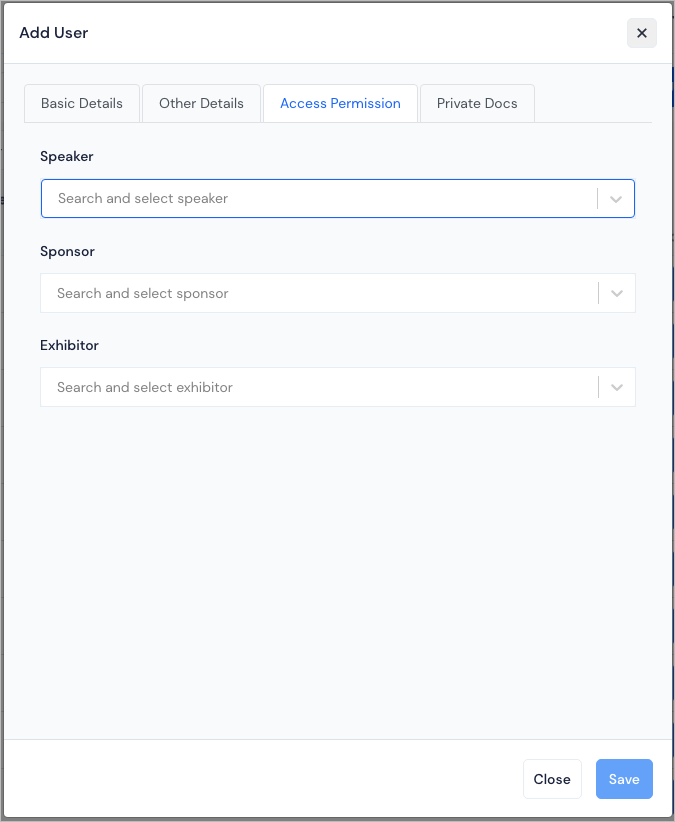
- The third tab- Access Permission, here you can select a Speaker, a Sponsor and an Exhibitor in case you are associated with any of them.
tip
Generally the event user will be added through ticket or registration. So, the user profile details form will be filled by the user themselves. Access permission will also be automatically assigned to the user through the ticket or can be added manually too.
- The fourth tab- Private Docs, here you can upload the necessary files for the user and those will be visible only to the user.
Note: Users can find the private files from their own profile in the app /web.

Click on Save to save all the added details.
Other ways you can manage the users#
- You can search, filter alphabetically, edit or delete the users if required.
tip
In Edit mode, you will find a fifth tab- Badge, here you can reset the design of the Badge you want to assign to the user. By default it will have the badge design available for the particular user group. This badge will consist all the information based on the selected design and can be used throughout the event for several purposes like event check-in, session check-ins, profile scanning etc.
There are separate tabs for Confirmed, Waitlist and Inactive users.
You can send a Welcome Mail to the users and also Allow App Access (when the user initiates login).
For physical events, you can mark their Check In status once they are in the event.
You can manage the user groups by creating new groups or reassigning users to different groups from the Manage Groups option.
There are options to bulk import or export the users. You can export the excel file with the information of the users. For importing, you can use the template file to create your data and upload all users in just a few clicks.
FAQs#
Q: How does a Lead Scanning feature help an exhibitor?
For in-person events, an exhibitor can add leads through a QR scan. It helps an exhibitor to record the queries generated at the venue.
Q: Is there an option for 3rd party CRM integration with Eventify's lead scanning system?
Eventify helps exhibitors at every stage of lead nurturing, right up to conversions. Third-party CRM solutions can be integrated with our lead scanning system, on request.
Q: Can the scanning be done through staff's own mobile device on Android or iOS?
Lead Scanning is easy to use because of its cross-platform functionality and can be used with a booth staff’s own mobile device on Android or iOS.